|
The most important change is that all scans are now sent directly via email to the user. Scanning to a central file area via Samba is no longer supported.
When you first approach the copier, it may be in power-saving mode. This is indicated by a blank screen and a bright green light at the top right of the control panel. Press the green light to wake the copier up. Documents can be scanned using the document feeder or by placing them directly on the glass. You can also specify whether the documents to be scanned are one or two-sided. After the copier wakes up, The following screen should appear:
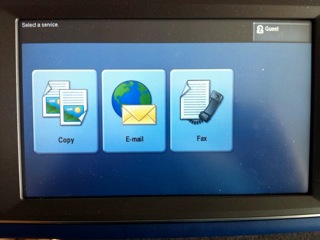
To begin scanning, press the button on the screen marked 'E-mail'. This screen will appear:
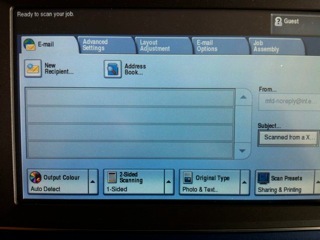
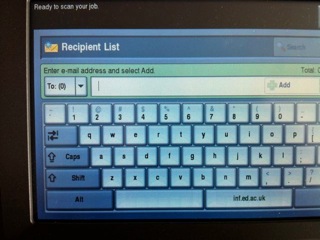
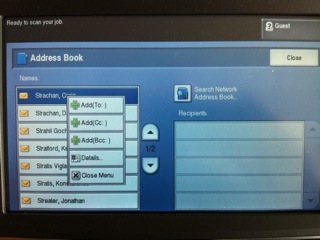
type in the first few characters of the name of the person you wish to the send the scan to and press the 'Search' button on the top right hand side of the screen. After a few seconds, a list of all the names in the School's LDAP directory which match the characters you have typed in will appear. If the list covers more that one page, you can move through the pages using the arrows to the right of the list. Once you have found the name you want, tap it.
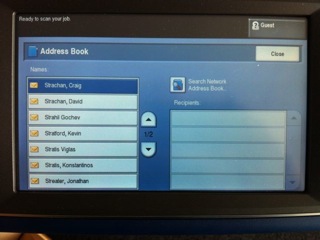
A sub-menu will appear allowing you to specify which field this address should appear in. Tap the appropriate option. Then tap the 'Close' button at the top right hand side of the screen.
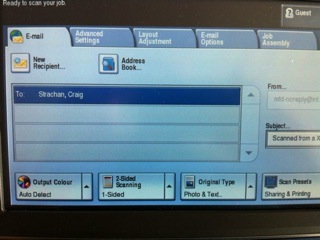
When you are happy that all the settings are correct, press the large green button on the botton right of the control panel.
If the article being scanned is a regular size and shape, for instance an A4 sheet of paper, then scanning will begin. If the article is an irregular shape, the following screen will appear:
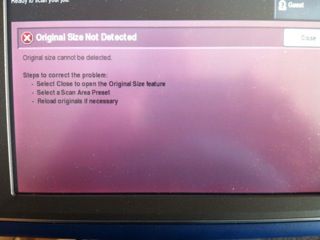
Press the 'Close' button on the top right of the screen. You will be taken to the 'Original Size' screen as seen below:
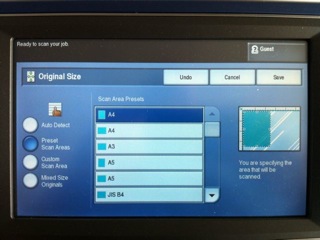
Choose the option which encompasses the item you are trying to scan and press the large green button on the bottom left of the control panel. The item should then be scanned.
After the scan has been completed, you should be returned to the recipient list. You can now go ahead and scan another item if you wish. If you do nothing, after a couple of minutes the recipient list will be cleared and the copier will go back into power-saving mode.
For more details about the more advanced scanning options, please see the online manual which can be found here.
|
Informatics Forum, 10 Crichton Street, Edinburgh, EH8 9AB, Scotland, UK
Tel: +44 131 651 5661, Fax: +44 131 651 1426, E-mail: school-office@inf.ed.ac.uk Please contact our webadmin with any comments or corrections. Logging and Cookies Unless explicitly stated otherwise, all material is copyright © The University of Edinburgh |

